Skip to content
Login

Getting Started

5
  • Introduction
  • How to Register on Onigiri Loyalty Platform?
  • How to Login with Phone?
  • How to Login with Email?
  • How to Recover your Account Password?

Cards Creation

8
  • Stamp
  • Multipass
  • Cashback
  • Certificate
  • Coupon
  • Membership
  • Discount
  • Reward

How To Install the Card

5
  • iPhone (iOS)
  • Android
  • PWA Cards on Android
  • Google Pay on Android
  • How to Restore the Card

Customers (CRM)

4
  • Customer Profile
  • Import/export
  • Customer Filters
  • RFM Analysis

Managers

3
  • Add/ Edit/ Delete
  • Manager Profile
  • Statistics

Dashboard

1
  • Dashboard

Feedback Collection

1
  • Feedback collection

Geolocations

2
  • Geolocations
  • How to Access Locations Section?

Push Notifications

16
  • How it Works?
  • iPhone (iOS)
  • Android
  • How long does it take for push messages to be received by our customers?
  • Why aren’t my customers receiving push messages?
  • Push Section
  • Marketing Push
  • Sending messages to all customers
  • Sending messages to a segment of customers
  • Sending message to an individual customer
  • Geo-push
  • Push automation
  • Feedback collection
  • Next visit reminder
  • Birthday congratulation
  • Triggered auto-push

Settings

8
  • API Documentation
  • Suki Card API Access
  • Settings
  • Plan
  • Personal Settings
  • Integrations
  • Webhooks
  • How the Referral System Works

Scaner App

11
  • How Scanner App Works
  • Installation
  • Login in the Scanner App
  • Scanner app – Stamp
  • Scanner app – Multipass
  • Scanner app – Cashback
  • Scanner app – Certificate
  • Scanner app -Coupon
  • Scanner app – Membership
  • Scanner app – Discount
  • Manager Seats

Web Development

1
  • Using the Suki Cards Visual Feedback Tool
View Categories
  • Home
  • Docs
  • Managers
  • Manager Profile

Manager Profile

Create manager seats for your sales persons to get access to Scanner App

1. Upon successful login, navigate to the left-hand menu.

2. From the list of modules displayed, click the

icon. Doing so takes you to the Managers screen.

3. Here, information for all existing managers is tabulated via a number of columns that include User Name, Created, Notes, Location, and Status.

4. Clicking the username of a manager displays the details of the selected manager profile. Here, the basic details of the selected manager profile are displayed via separate tiles under the Manager Profile heading. They include Name, Registration Date, Status, Location, Number of Transactions, and Last Transaction Date.

5. Next up is the Information section where the details of the manager account are displayed in editable view.

6. Once you have edited the required fields, click the Save button.

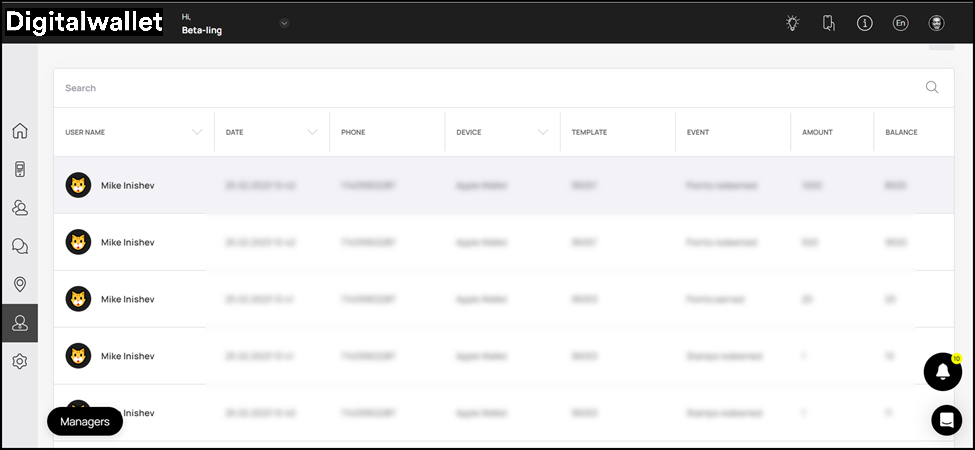
7. At the end is the Last Transactions grid. Here, the last transactions of the manager are tabulated via several columns that include User Name, Date, Phone, Device, Template, Event, Amount, and Balance.

Updated on December 12, 2024

What are your Feelings

  • Happy
  • Normal
  • Sad

Share This Article :

  • Facebook
  • X
  • LinkedIn
  • Pinterest
Add/ Edit/ DeleteStatistics
SUKI CARD

Digital Loyalty for Local Businesses

FacebookInstagramEmail

QUICK LINKS

How It Works
Growth Suite
Case Studies
Web Development
Blog
Demo

SUPPORT

FAQ
Testimonials
Help Center
Affiliate Program

GET STARTED

Start Free Trial · Book a Free Call · Create Account

Works with Apple Wallet & Google Wallet

© 2026 Suki Card. All rights reserved. · Privacy · Terms