Skip to content
Login

Getting Started

5
  • Introduction
  • How to Register on Onigiri Loyalty Platform?
  • How to Login with Phone?
  • How to Login with Email?
  • How to Recover your Account Password?

Cards Creation

8
  • Stamp
  • Multipass
  • Cashback
  • Certificate
  • Coupon
  • Membership
  • Discount
  • Reward

How To Install the Card

5
  • iPhone (iOS)
  • Android
  • PWA Cards on Android
  • Google Pay on Android
  • How to Restore the Card

Customers (CRM)

4
  • Customer Profile
  • Import/export
  • Customer Filters
  • RFM Analysis

Managers

3
  • Add/ Edit/ Delete
  • Manager Profile
  • Statistics

Dashboard

1
  • Dashboard

Feedback Collection

1
  • Feedback collection

Geolocations

2
  • Geolocations
  • How to Access Locations Section?

Push Notifications

16
  • How it Works?
  • iPhone (iOS)
  • Android
  • How long does it take for push messages to be received by our customers?
  • Why aren’t my customers receiving push messages?
  • Push Section
  • Marketing Push
  • Sending messages to all customers
  • Sending messages to a segment of customers
  • Sending message to an individual customer
  • Geo-push
  • Push automation
  • Feedback collection
  • Next visit reminder
  • Birthday congratulation
  • Triggered auto-push

Settings

8
  • API Documentation
  • Suki Card API Access
  • Settings
  • Plan
  • Personal Settings
  • Integrations
  • Webhooks
  • How the Referral System Works

Scaner App

11
  • How Scanner App Works
  • Installation
  • Login in the Scanner App
  • Scanner app – Stamp
  • Scanner app – Multipass
  • Scanner app – Cashback
  • Scanner app – Certificate
  • Scanner app -Coupon
  • Scanner app – Membership
  • Scanner app – Discount
  • Manager Seats

Web Development

1
  • Using the Suki Cards Visual Feedback Tool
View Categories
  • Home
  • Docs
  • Scaner App
  • Scanner app – Discount

Scanner app – Discount

Learn how to charge discount card

1. Upon successful login, tap the Scan button.

2. This initiates the scan process by opening the camera of your mobile device. If this is the first time, the scanner app will ask you to allow permission to access your device camera.

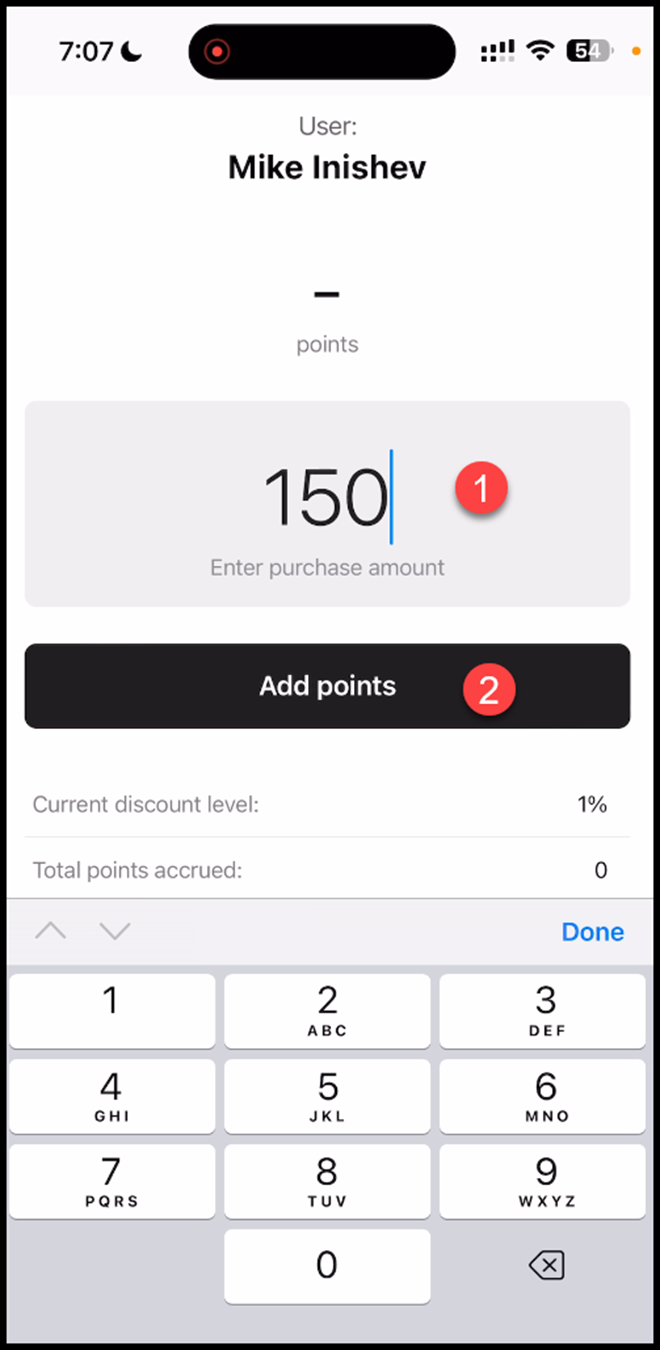
3. Here, enter the amount you want to add in the Enter Purchase Amount field. Once added, click the Add Points button.

4. This opens the Confirmation popup. To confirm the points addition, click the Confirm button.

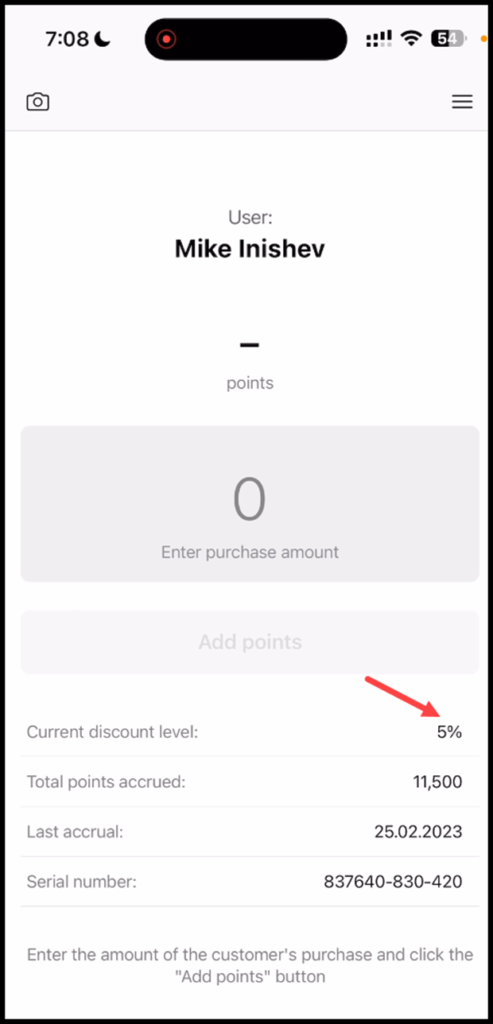
5. Once this is done, scan the card once again. You will see the added points in the Total Points Accrued field.

478

6. Once the added points reach the level defined for the tier, the Current Discount Level increases as well.

Updated on October 20, 2023

What are your Feelings

  • Happy
  • Normal
  • Sad

Share This Article :

  • Facebook
  • X
  • LinkedIn
  • Pinterest
Scanner app – MembershipManager Seats
SUKI CARD

Digital Loyalty for Local Businesses

FacebookInstagramEmail

QUICK LINKS

How It Works
Growth Suite
Case Studies
Web Development
Blog
Demo

SUPPORT

FAQ
Testimonials
Help Center
Affiliate Program

GET STARTED

Start Free Trial · Book a Free Call · Create Account

Works with Apple Wallet & Google Wallet

© 2026 Suki Card. All rights reserved. · Privacy · Terms